Enclosure Do It Yourself Tips

Mantidforum

Help Support Mantidforum:

This site may earn a commission from merchant affiliate links, including eBay, Amazon, and others.

sporeworld

Well-known member
Joined
Jan 30, 2009
Messages
1,660
Reaction score
49
Location
Los Angeles, CA
This goes out to all you Do It Yourself" ers. Which, sadly, I am not. Not yet, anyway.

I'm doing more and more with glass and acrylic enclosures - adding mesh or screen to certain areas.

For the acrylic, I've been using a soldering iron and just melting my way through it (brutal, I know). What tools are you folks using? There are ideas and references in "Bugatorium", but I wanted to be more specific.

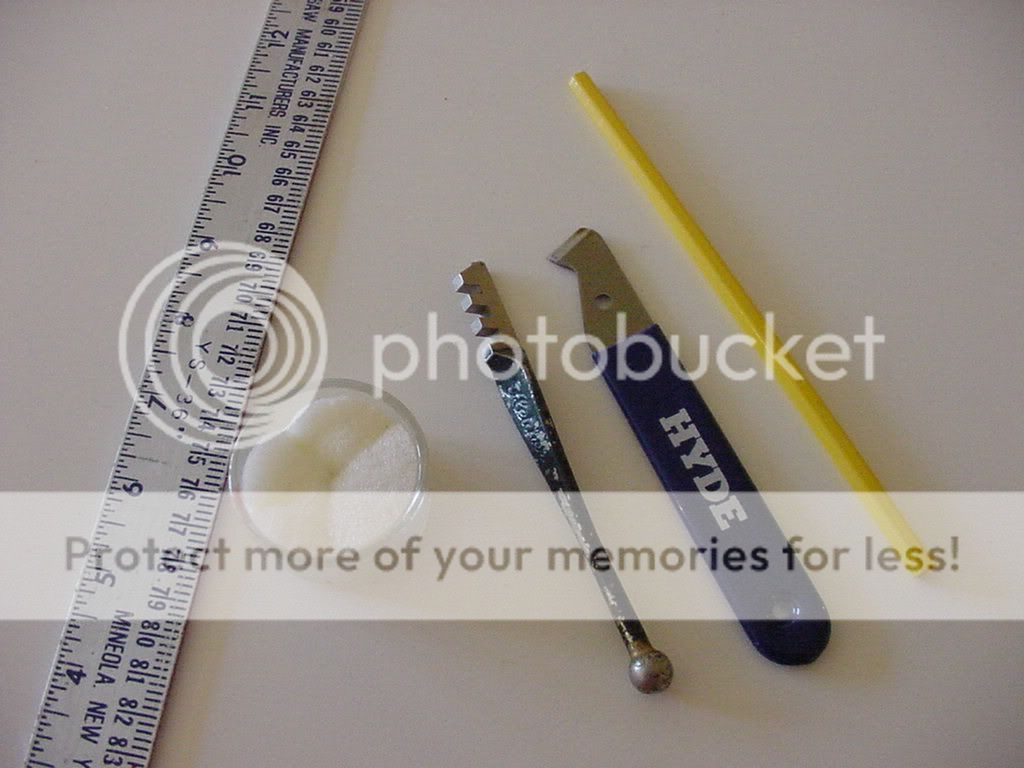
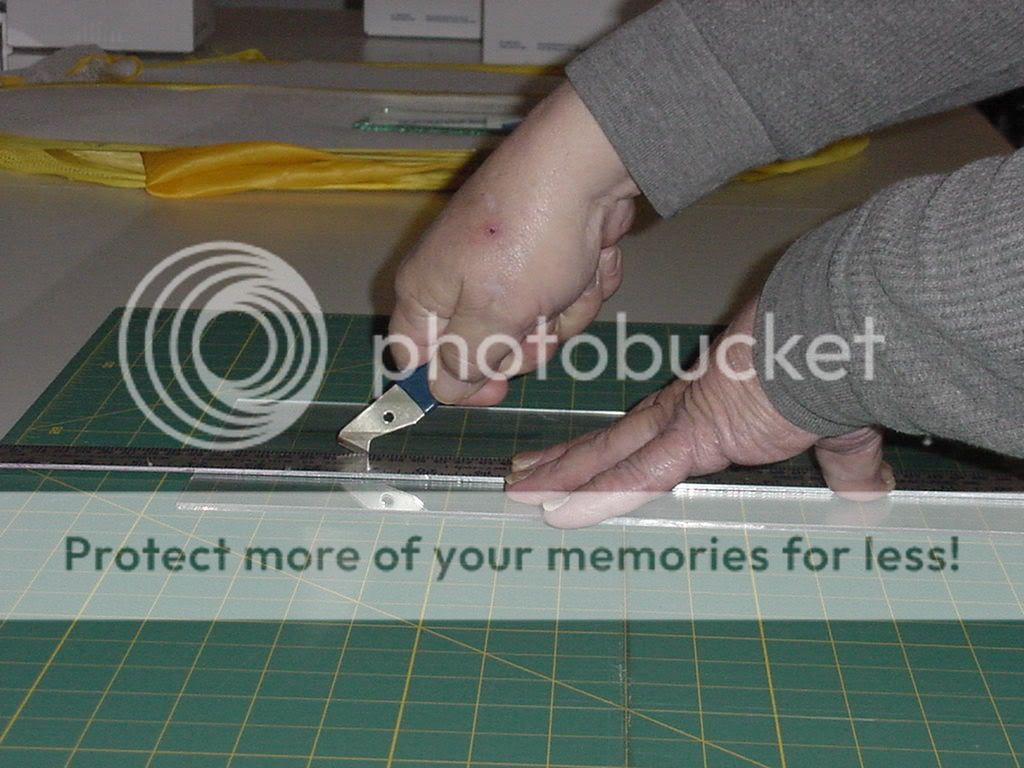
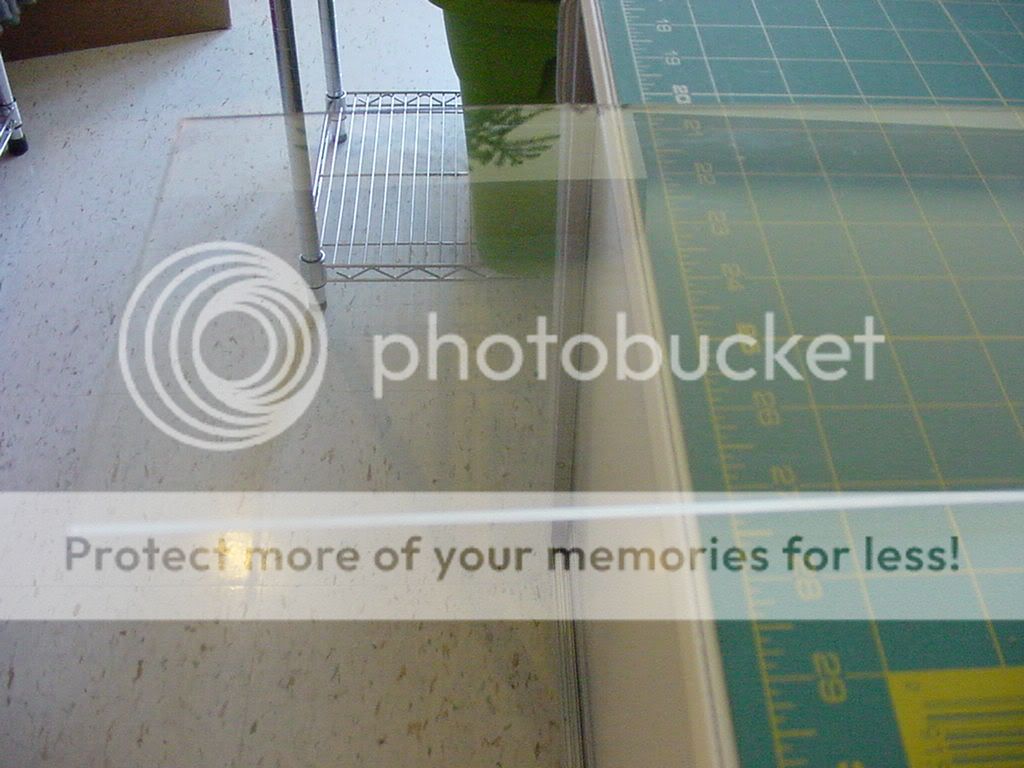
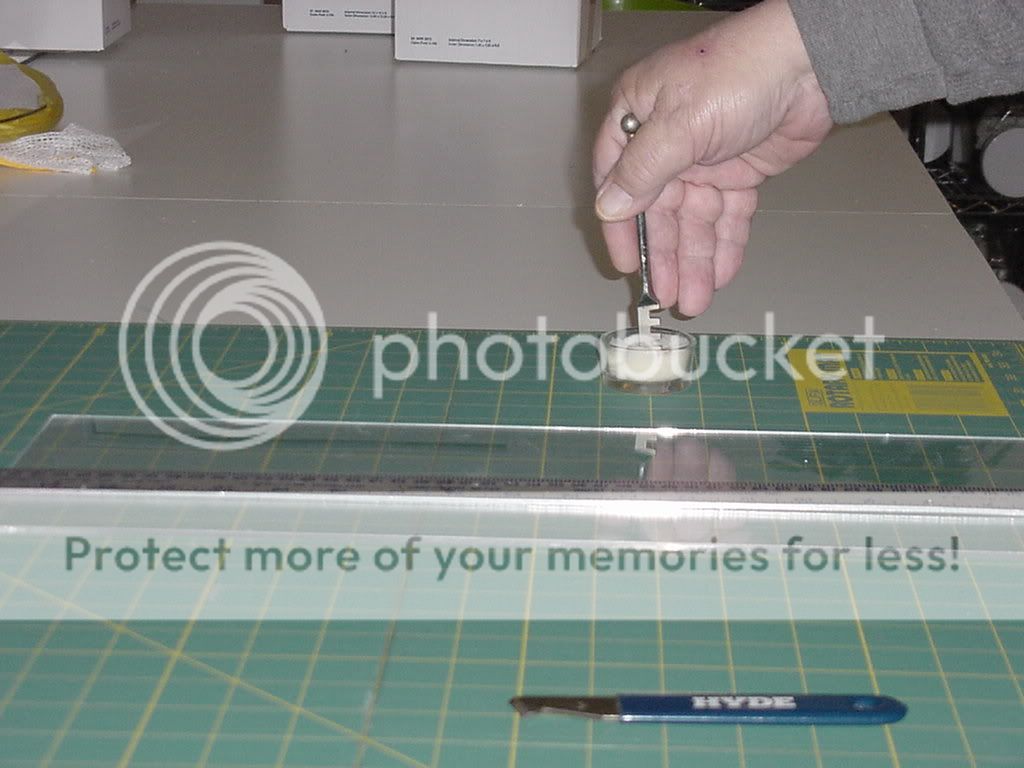
For the glass, I'm just terrified to approach cutting it. Any suggestions or points in the right direction?

For screens, I've used aluminum and fiberglass with degrees of success. Recently, I've been very happy with the type of plastic screening I bought from mantisplace. Any opinions on screening out there? Even minimally, I've seen some good work with the typical deli-cup-style enclosures, but with entire portions removed and replaced with screen.

I've recently been glueing sheets of screen to the back of acrylic enclosure to aid climbing.

I know a bucn of you/us have been puzzling with enclosures for Idolos. Animalexplorer, Precarious, guapoalto049, Angelofdeathzz (I'm sure there's a dozen more)... Any input?

Cheers!

 
Last edited by a moderator:
I've found if you use screen on the back (or any where for that matter) even on the top, you run into the chance they will molt on it, which is bad as they can fall very easy on the mesh/screen do to how small and slick the surface is compared to how big there hooks on there feet are.

Simply going outside and grabbing some some drinking straw size branches and putting them in the oven at 175-190 for a hour or two to dry and kill any unwanted pests or fungi is a easy way to give them climbing and HANGING(glued to the top) surfaces that are the way they would be going about it in the wild, and don't forget the Sphagnum Moss a inch or two thick on the bottom that once wet will stay moist for 2 days to provide high RH with minimal effort and no mold ever.

I've had NO bad molts since I adopted this method of enclosure, it has a very natural look and feel so it looks good and there feet are made for it as in the wild. try it yourself and your mantis will thank you.

I could post some picks of my cages but I think most have seen them already?

P.S. I even glued twigs to my smaller 80oz deli cup lids and that greatly helped with smaller nymphs for molting. :)

 
Thanks. I'm already sold on the twig idea. You're right about molting problems on the screen. Sigh.

I'd love to have a hex-shaped aquarium, so I could line the edges, but peer through the face. Still on the drawing board.

 
@Angel: That's such a great idea to put sticks in the oven! I've been collecting sticks from my backyard, but I always worry about what bugs and molds might be lurking inside. Thanks so much! I will do that from now on!

 
@Deby, I'm glad to be able to help, your very welcome. :)

Sometimes people get over technical on mantis care, but keeping it simple and using common sense is the best way if you ask me. I mean you can spend a bunch of cash on things for inside your encloser but all you need and all your mantis want can be found for free...

nature is better than plastic and mesh. if it gets crudy or moldy throw it away and get another free object. ;)
That's exactly how I feel! Plus, it helps when you don't have any cash (like me, a poor college student)... you can just go outside and decorate all your mantis cages for free! And now that I have the stick problem solved, I can rest easy that my mantids are safe. :)

 
Last edited by a moderator:
Four types of material covered here is going to be, fiberglass screen, wire screen, acrylic , Plexiglas, and glass:

Fiberglass can be cut with razor knife, or any good pair of scissors

Wire screen is cut best with kitchen scissors

Acrylic and Plexiglas is cut with a special Scoring knife

Glass is cut with a diamond glass cutter & a small bit of cutting fluid, this is made of kerosene and any oil , such as 3 in 1, 10 w 30 or such.

Pair of leather gloves is smart!

HERE IS PIC OF TYPICAL TOOLS NEEDED

MVC-500F.jpg
and also some pressure clips to help hold the straight edge.

Cutting acrylic or Plexiglas is simple and only a few tools are needed. A scoring knife is especially made for scoring this material.

You must have a straight edge and a tape measure is nice too! I also like to have a fine tip marker of wax pencil to make my marks.

Take and lay the straight edge on the marks you made with your wax pencil & use pressure clips to help hold it down.

MVC-498F.jpg


When scoring the acrylic, more is good, you need to hold scorer as shown, and use a lot of pressure. What you are doing with each score is "scoring away layers of the acrylic" . When you think you have scored it enough (you will start to smell the plastic as it gets hot with each score) , then remove the straight edge and take the acrylic and put the scored marks you made at the edge of a table. What you want here is to have the score right on the edge, and it is also a good idea to have on a pair of gloves. With one hand hold the acrylic on the table, and with the other hand start bending the other half down, it should snap easily, if it does not seem to be giving, start over with straight edge and scoring. It only takes about 8 good scores to score an 1/8" piece of acrylic and a BIT more than that for 1/4", which is much harder to do.

MVC-501F.jpg


When you are done, some fine sandpaper can be used to smooth off any rough edges.

Also while on the subject of acrylics and plexis, instead of melting holes that are need, a fine tool is the hole cutter and drill bits as seen in the Bugatorium post, this makes great even holes and you can also get a tool to ream the holes to remove rough edges in either application.

Glass also needs a straight edge and some pressure clips to hold it in place. Take and lay the straight edge on the marks you have measured and clip to hold in place.

DIP THE GLASS CUTTER IN YOUR OIL AND KEROSENE MIXTURE

MVC-499F.jpg


VERY IMPORTANT, IS WHEN CUTTING GLASS, DO NOT STOP AND RESTART, YOU WILL NEVER LINE UP THE NEW AND OLD CUT, ONCE YOU START, YOU MUST FINISH.

THE GLASS CUTTER IS HELD AS SHOWN AND USE A GOOD AMOUNT OF PRESSURE WHEN SCORING WITH IT, SCORE 1 TIME ONLY. WHEN YOU ARE ALMOST AT THE END OF THE CUT, LET UP A BIT ON THE CUTTER AS NOT TO CHIP THE GLASS WHEN GOING OFF OF IT.

MVC-496F.jpg


THIS IS NOT HOW TO HOLD CUTTER

MVC-497F-1.jpg


When you have made your cut, take and remove the straight edge and turn the glass so that it is laying with the cut score on the edge of a table, hold the glass close to the edge of the table tightly and with other hand, bend the glass down evenly and it should break right off for you. Please use gloves! This has to be done in a clean quick snap or it will probably just break off and leave you with half unbroken. It is a good thing to practice with small pieces of glass less than 12" in withe so you get the feel of amount of pressure needed and holding of the cutter.

MVC-501F.jpg


Last edited by a moderator:
ps that is bubbys hands, and he is a Master Glazier! He taught me all about this stuff! ;)

ps, if you cannot find the cutters, I sell them for 5.95 each. They are not on my site.

 
Last edited by a moderator:
Awesome, as always.

I'm going to play with acrylics this weekend, and maybe save glass for another day. Kiiinda scary....

 
Dont feel bad, I can do acrylics, but still havent got the hang of glass, kids did when little, but I never liked it! also the mix formula for cutting oil, is 50/50!


Latest posts

Top